 by
Lighting faults account for a large share of MOT failures every year, and they are almost entirely preventable with a check that takes two minutes. The more interesting question is not why a bulb has blown, but why the same one keeps blowing, because a bulb that fails repeatedly in the same position is reporting a fault rather than bad luck.
Why vans are harder on lights than cars
Rear light clusters on a panel van sit at the back of a long, flexing body, close to the ground, and are exposed to spray, road salt and constant vibration through the door frames. Rear doors and tailgates flex every time they are slammed. Trailer sockets and towbar wiring add junctions in the wettest possible location. All of this makes water ingress and connection corrosion the dominant causes of van lighting faults.
Safety notes
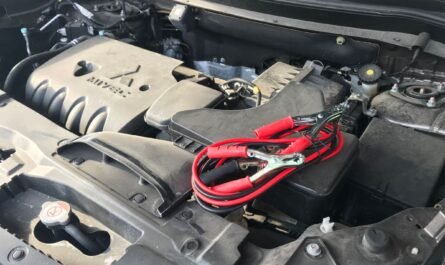
Disconnect the battery negative terminal first and reconnect it last where a job requires isolation. Batteries give off hydrogen and can explode if ignited, so keep sparks and flames away, and wear eye protection as battery acid causes burns.
Disconnecting the battery on a modern van can lose stored settings and may require relearn procedures afterwards. Never bypass a fuse with a higher rated one or with wire, as fuses protect against fire.
Common faults and what they mean
One bulb out
Usually just a bulb. Replace it, but note which position and keep an eye on it.
The same bulb keeps blowing
This is the diagnostic case worth understanding. Causes include:
- Vibration from a loose lamp unit or a poorly seated bulb holder, which shakes the filament apart.
- Moisture inside the lens, which thermally shocks a hot bulb.
- Overvoltage from a charging system fault, which shortens the life of every bulb on the van rather than one.
- A poor earth causing the circuit to behave abnormally.
- Handling the glass on halogen bulbs. Oil from skin creates a hot spot and shortens life dramatically. Always fit halogen bulbs with clean gloves or a cloth.
Indicators flashing rapidly
Nearly always a failed bulb on that side, since the flash rate depends on the load in the circuit. Check the side repeater as well as the front and rear, because it is easy to miss.
Multiple lights out on one side
Points at a shared earth for that side rather than several coincidental bulb failures. Find the earth point, clean it back to bare metal and protect it.
Lights dim, flickering or behaving oddly
Classic poor earth symptoms. Current takes an unintended path and lights illuminate faintly or come on when a different circuit is used. If pressing the brake makes the indicators do something strange, you have an earth fault, not five separate faults.
Condensation inside the lens
Common on vans and not always a fault in itself, as some misting clears. Standing water is different and needs the seal or the unit replacing before it corrodes the holders and the bulbs start failing.
Dashboard bulb failure warning that will not clear
On vans with bulb monitoring, fitting LED bulbs in place of filament ones often triggers this, because the system reads the lower current draw as a failed bulb.
Diagnostic sequence
1. Check every light systematically
Check: With help, or by reversing towards a window or wall at dusk, check dip and main beam, sidelights, all indicators including side repeaters, brake lights including the high level lamp, reversing lights, fog lights and the number plate lamp.
Next action: Do this weekly on a working van. It is the single cheapest MOT preparation available. See common van MOT failures.
2. Inspect the holder and connector
Check: Remove the bulb and look at the holder contacts for corrosion, discolouration or heat damage, and check the bulb is a firm fit.
Result and next action: Green or white corrosion, or blackened contacts, explains repeat failures. Clean the contacts and, if the holder is heat damaged, replace it.
3. Find and clean the earth
Check: Trace the earth wire for the affected lamp to its body attachment point.
Next action: Clean to bare metal, refit securely and protect with grease. This resolves a very high proportion of odd lighting behaviour on older vans.
4. Check charging voltage
Check: Voltage across the battery with the engine running.
Next action: Excessive charging voltage shortens bulb life across the whole van. If bulbs are failing in several positions, suspect this rather than coincidence. See alternator fault testing.
5. Inspect the flexible sections
Check: Wiring at the rear doors and, on vans with a sliding door, that loom too.
Next action: These flex constantly and break internally. See sliding door loom faults.
6. Disconnect trailer wiring to test
Check: If a towbar is fitted, unplug or isolate the trailer socket and re-test.
Next action: Corroded trailer sockets cause bizarre lighting faults, including lights coming on together or failing intermittently in wet weather. Very common and often overlooked.
A note on LED conversions
Retrofitting LED bulbs into a van designed for filament bulbs is popular but brings complications worth knowing before you buy. Bulb monitoring systems may report a failure because of the lower current draw. Indicator circuits may flash rapidly for the same reason. Beam pattern matters: an LED in a reflector designed for a halogen filament may not produce a legal or effective beam, and headlight aim is an MOT item. For exterior lighting subject to construction and use requirements, fit bulbs that are correctly approved for road use rather than assuming any LED is acceptable.
Indicative UK costs
Broad context only. Bulbs are inexpensive, often a few pounds each. Bulb holders and connectors are modest. A complete rear light cluster commonly runs from around thirty pounds into the low hundreds depending on the van. Wiring repairs are mostly labour. Headlight alignment is usually a small charge. Get quotes.
Common mistakes
- Replacing a repeatedly failing bulb without asking why. Something is causing it.
- Touching halogen glass with bare fingers. Dramatically shortens life.
- Ignoring condensation. Standing water corrodes holders and kills bulbs.
- Overlooking the earth. The cause of most strange lighting behaviour.
- Forgetting the number plate lamp and side repeaters. Both are MOT items and both are easy to miss.
- Fitting non-approved LEDs. May be an MOT issue and can trigger dashboard warnings.
When to stop and get help
Get help if you find melted or discoloured wiring or connectors, which indicates excessive current and is a fire risk, or if lighting faults appear alongside other electrical problems, which suggests a charging or earth fault affecting the whole van. Do not drive at night with defective lighting.
Prevention
Check all lights weekly. Keep lenses and seals intact, and replace a cracked lens promptly. Clean and protect earth points, particularly on older vans. Have the charging system checked annually. Keep trailer sockets covered and clean when not in use.
Frequently asked questions
Why does the same bulb keep blowing?
Vibration, moisture, a corroded holder, a poor earth or overvoltage. A repeatedly failing bulb is a symptom, not the fault.
Why are my indicators flashing fast?
Almost always a blown bulb on that side. Check the side repeater too.
Can I fit LED bulbs to my van?
Sometimes, but check they are correctly approved for road use, be aware bulb monitoring may report false failures, and remember beam pattern and headlight aim are MOT items.
Is condensation in a light unit an MOT failure?
Light misting often is not, but standing water or a damaged lens can be. It will also shorten bulb life, so it is worth addressing either way.
This guide is general information for UK van owners, not vehicle-specific repair instructions. Procedures, tolerances and component layouts vary by engine code and model year. Confirm any figures against your VIN and manufacturer workshop information, and see our Disclaimer before carrying out any work.