 by
Shock absorbers deteriorate at a rate slow enough that the driver adapts without ever registering a change. This is why so many owners describe a van as transformed after replacement, having genuinely believed nothing was wrong. On a working van that carries weight, the effect on stability and stopping distance is not trivial.
What a damper actually does
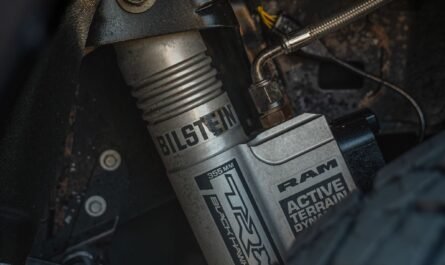
The springs support the weight and absorb bumps. The damper controls how quickly the spring is allowed to compress and rebound. Without effective damping the spring keeps oscillating after every input, so the tyre loses consistent contact with the road surface.
That is the point that matters: worn dampers do not simply make the ride less comfortable, they reduce how consistently the tyres are pressed against the road. That affects braking, steering response and stability, particularly when laden.
Safety notes
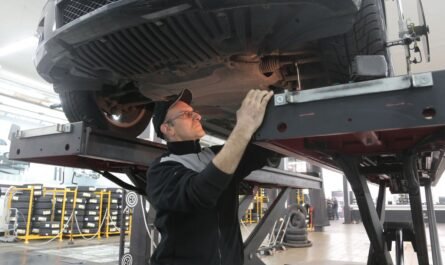
Never work under a van supported only by a jack. Use axle stands rated for the weight at the manufacturer support points, on firm level ground, with the parking brake applied and the wheels chocked. Wear eye protection when working underneath, as corrosion debris falls.
Suspension components can store considerable energy. Coil springs in particular must never be disturbed without proper spring compressors, and even then the job carries real risk. If you are not equipped for it, this is a job for a garage.
Symptoms
- Floating or wallowing over undulations, with the body continuing to move after the bump has passed.
- Nose dive under braking and squat under acceleration, more pronounced than it used to be.
- Poor stability in crosswinds or when passing high-sided vehicles. Very noticeable on a tall panel van.
- Cupped or scalloped tyre wear, where uneven patches of wear appear around the tread. A strong indicator, because it is caused by the tyre bouncing.
- Clunking or knocking over bumps, often the damper mounting bushes rather than the damper itself.
- Visible fluid on the damper body, indicating a failed seal.
- Longer stopping distances, which most drivers will not consciously notice.
Why vans wear them faster
Weight is the main factor. A damper on a laden van is working considerably harder than the same unit on an empty one, and vans spend much of their lives loaded. Add in poor road surfaces, kerbing, site access and high annual mileage, and dampers on a working van have a genuinely harder time than on a private car.
Diagnostic sequence
1. Visual inspection first
Check: Look for oil film or wet streaks down the damper body, damaged or missing dust boots, corroded or bent bodies, and perished mounting bushes.
Result and next action: A visibly leaking damper has lost its damping fluid and needs replacing. This is the clearest evidence available without equipment. A light misting is not always terminal, but wet fluid running down the body is.
2. Check the mountings
Check: With a pry bar, check the top and bottom mounting bushes for play.
Next action: Knocking noises are very often the bushes rather than the damper. Worth establishing before buying dampers, though on many vans the bushes are integral and replacement means a new damper anyway.
3. The bounce test, with a caveat
Check: Push down hard on one corner and release. Traditionally, more than one or two rebounds suggests a worn damper.
Result and next action: Treat this as a rough indicator only. On a stiffly sprung van it is genuinely hard to generate enough movement by hand to learn much, and a damper can be significantly degraded while still passing this test. Do not conclude the dampers are fine on the strength of it.
4. Read the tyres
Check: Run your hand across the tread. Cupping feels like a series of high and low patches around the circumference.
Next action: Cupping is caused by the tyre bouncing rather than staying in contact, and points strongly at damping. See our guide to reading uneven tyre wear.
5. Compare side to side on a drive
Check: Note whether the van pulls, floats or feels different over bumps on one side.
Next action: Asymmetric behaviour suggests one failed unit, though replacement is still done in axle pairs.
6. Get them tested properly
Check: Many garages have suspension test equipment that measures damping efficiency at each wheel.
Next action: This turns a subjective judgement into a measurement, and is worth doing if you are unsure rather than guessing at a four-figure decision on a set.
Replacement
Always replace in axle pairs. A new damper on one side and a worn one on the other produces genuinely unbalanced handling, which is worse than two equally tired units.
Choose dampers rated for a commercial vehicle rather than the cheapest available. A van carrying weight needs the damping rate it was designed with, and very cheap units frequently do not deliver it or do not last. Where the van is used consistently heavily laden, heavy-duty options exist and can be a sensible choice, though they will firm up the unladen ride.
Replace mounting bushes and any specified fasteners at the same time. Where a top mount is a separate component, inspect it while everything is apart.
Indicative UK costs
Broad context only. Van dampers commonly run from around fifty pounds each into the low hundreds for quality or heavy-duty units, with fitting time depending on access and corrosion. Rears on a leaf-sprung van are often straightforward; fronts can take longer. Budget for a pair rather than a single unit. Get quotes.
Common mistakes
- Relying on the bounce test. It misses a lot of genuinely worn dampers on stiffly sprung vans.
- Replacing one side only. Creates an imbalance that can handle worse than the original problem.
- Buying the cheapest available. On a vehicle that carries weight, damping rate matters.
- Ignoring cupped tyres. They are telling you something specific.
- Assuming a quiet damper is a healthy one. Dampers usually fail silently; the noise comes from the bushes.
- Not checking springs at the same time. Tired springs and tired dampers produce overlapping symptoms. See leaf spring problems.
When to stop and get help
Get help promptly if a damper is visibly leaking, if the van becomes unstable in crosswinds or under braking, or if you find significant play in the mountings. Damper replacement on the front of many vans involves the coil spring, which stores considerable energy and must never be disturbed without proper spring compressors. If your van has front coil springs and you are not equipped for that, hand the job over.
Prevention
Avoid habitual overloading. Slow down for potholes and kerbs where you can. Have the suspension inspected at each service. Address cupped tyre wear when you first feel it rather than after a set of tyres has been ruined.
Frequently asked questions
How long do van shock absorbers last?
There is no reliable figure, because load, road surface and mileage dominate. A van that carries weight all day on poor roads will need them far sooner than one doing light motorway work.
Will worn dampers fail the MOT?
A leaking or badly deteriorated damper will fail. Dampers that are simply tired but not leaking may pass while still performing poorly, which is why the MOT is not a substitute for assessment.
Do I have to replace them in pairs?
It is strongly advisable. Mismatched damping across an axle produces unpredictable handling.
Are heavy-duty dampers worth it?
If the van is consistently loaded, often yes. If it usually runs empty, they will make the ride noticeably harsher for little benefit.
This guide is general information for UK van owners, not vehicle-specific repair instructions. Procedures, tolerances and component layouts vary by engine code and model year. Confirm any figures against your VIN and manufacturer workshop information, and see our Disclaimer before carrying out any work.