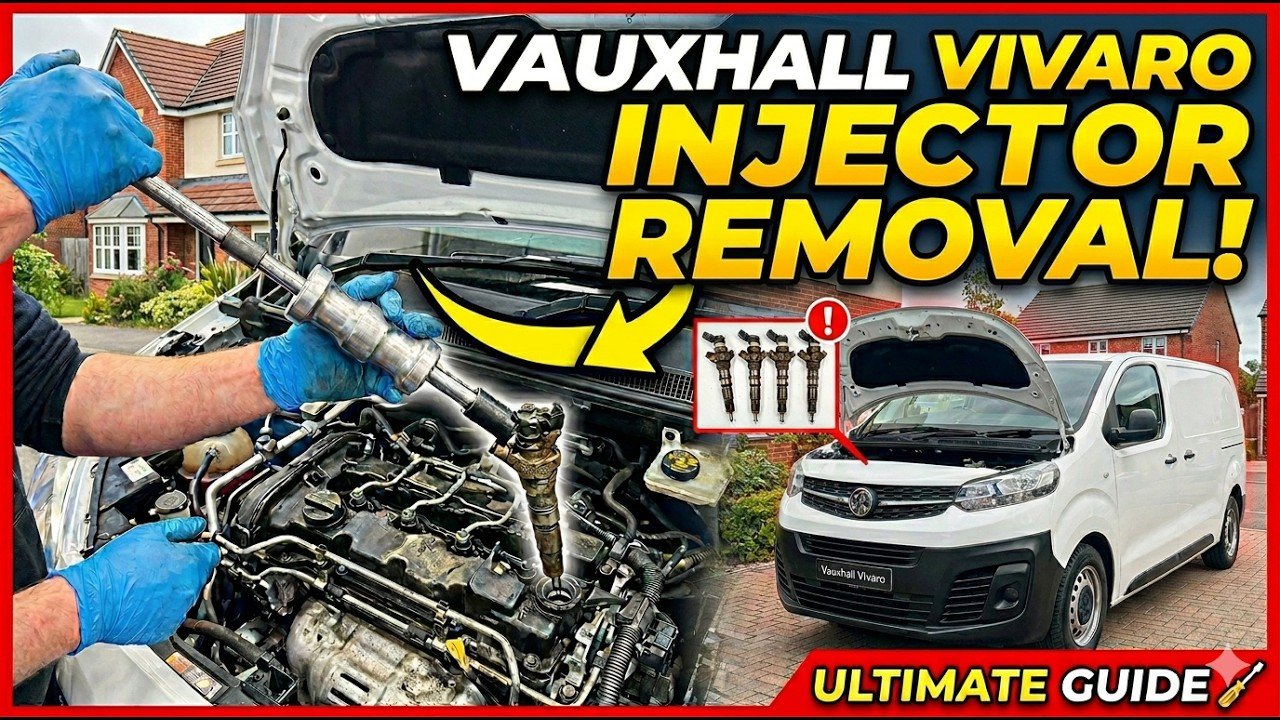
If you are trying to remove a diesel injector from a 2020 Vauxhall Vivaro Mk3 1.5 Turbo D, you may quickly find that the job is more involved than simply undoing the injector clamp and pulling the injector out.
The third-generation Vauxhall Vivaro C, introduced for the 2019 model year, uses Stellantis/PSA-based diesel engines. On the 1.5-litre version, two engine references you may come across are DV5RUC and DV5RUCd. These engines are also associated with the D15DTH/D15DT naming used in Vauxhall applications.
This guide explains the basic process for Vauxhall Vivaro injector removal on a 2019, 2020, 2021, 2022, 2023, 2024, 2025 or 2026 Vivaro Mk3, with particular attention to the 1.5 diesel DV5RUC / DV5RUCd engine.
Important: Modern common-rail diesel systems operate at extremely high fuel pressure. Never loosen a high-pressure fuel pipe with the engine running. Allow the vehicle to cool, work cleanly and make sure residual fuel pressure has been dealt with according to the correct workshop procedure. If you are not experienced with common-rail diesel systems, injector removal is better carried out by a qualified technician.
Which Vauxhall Vivaro Does This Guide Cover?
The main vehicle covered here is:
Vauxhall Vivaro C / Vivaro Mk3
Model year: 2019 onwards
Engine: 1.5 diesel / 1.5 Turbo D
Engine family: DV5
Common engine references: DV5RUC and DV5RUCd
Typical Vauxhall engine references: D15DTH / D15DT
The DV5RUC is commonly listed with the 120 hp / 88 kW Vauxhall Vivaro C 1.5 diesel, while DV5RUCd is another 1.5-litre DV5 variant used within this vehicle family.
Do not automatically use this procedure for a 2.0 Vivaro diesel, because the 2.0-litre DW10 engine has a different layout and components.
Always confirm the engine code from the vehicle identification information before ordering injectors, seals or specialist tools.
Symptoms of a Faulty Vivaro 1.5 Diesel Injector
Before removing an injector, it is worth making sure the injector is actually responsible for the problem.
Common symptoms can include:
- Difficult starting, particularly when cold
- Rough idle
- Engine misfire or uneven running
- Diesel knocking
- Reduced engine performance
- Excessive exhaust smoke
- Poor fuel economy
- Engine management light
- Injector correction or balance values outside the expected range
- Diesel smell around the engine
- Black carbon deposits around the injector
- A chuffing or puffing sound around the injector seat
- Fuel leakage around the injector or high-pressure pipe
Carbon around the injector does not necessarily mean the injector itself has failed. A leaking injector sealing washer can allow combustion gases to escape around the injector body, gradually creating a thick carbon deposit sometimes known as injector blow-by or black death.
Correct diagnosis before replacing parts can save considerable money.
Tools Needed for Vauxhall Vivaro 1.5 Injector Removal
Depending on the condition of the injector, you may need:
- Metric socket set
- Ratchet and extensions
- Torx and/or E-Torx sockets as required
- Suitable spanners for the injector fuel pipes
- Electrical connector release tools
- Torque wrench
- Clean lint-free cloths
- Protective gloves and eye protection
- Injector puller suitable for the DV5 injector
- Injector seat cleaning or reaming tool
- Injector seal removal tool
- New injector copper sealing washer
- Replacement seals/O-rings where specified
- Protective caps for open fuel connections
- Diagnostic equipment if injector coding or adaptations are required
If the injector has been leaking combustion gases for a long time, a proper injector puller can turn a very difficult job into a manageable one.
Trying to lever the injector sideways with screwdrivers can damage the injector, cylinder head or surrounding components.
Vauxhall Vivaro 2020 Injector Removal – Step by Step
1. Confirm the Engine
Before dismantling anything, confirm that you are working on the 1.5 DV5RUC or DV5RUCd engine.
This is particularly important when searching online for “Vauxhall Vivaro injector removal”, because Vivaro Mk3 vans have been supplied with more than one diesel engine.
A video or guide covering a 2.0-litre Vivaro may not match the layout of your 1.5.
2. Let the Engine Cool Completely
Carry out injector work with the engine cool.
This reduces the risk of burns and makes it safer to work around the fuel system.
Keep the work area extremely clean. Even tiny particles of dirt entering a modern common-rail fuel system can cause expensive damage.
3. Disconnect the Battery Where Required
Follow the appropriate manufacturer procedure before disconnecting the battery.
Make sure the ignition is switched off and that any manufacturer-specified waiting period has passed before disconnecting electrical components.
4. Remove the Engine Cover
Remove or unclip the plastic engine cover to expose the top of the DV5 engine.
Do not force plastic clips or fittings, particularly on an older van where heat cycles may have made them brittle.
5. Remove Components Restricting Injector Access
Depending on the exact Vivaro specification, you may need to move intake ducting, wiring retainers, brackets or other components before gaining clear access to the injector rail and injectors.
Take photographs before removing multiple clips and hoses.
They make reassembly much easier.
6. Clean Around the Injectors
This is one of the most important parts of the job.
Before disconnecting the fuel system, remove loose dirt from around the injectors and fuel connections.
Do not allow contamination to enter:
- The injector
- High-pressure pipe
- Fuel rail
- Injector bore
- Leak-off/return system
Once a connection is opened, protect it using suitable clean caps.
7. Disconnect the Injector Electrical Connector
Release the electrical connector from the injector you are removing.
Do not pull directly on the wires.
Connector locks can be delicate, so identify how the locking mechanism releases before applying force.
8. Disconnect the Injector Leak-Off / Fuel Return Connection
Carefully disconnect the injector return or leak-off connection.
Plastic fuel return fittings can become brittle, so avoid twisting or levering them unnecessarily.
If a clip or seal is damaged during removal, replace it rather than risking a diesel leak after reassembly.
9. Remove the High-Pressure Injector Pipe
Make absolutely certain the common-rail system is not pressurised before opening it.
Carefully loosen and remove the high-pressure fuel pipe serving the injector.
Avoid bending, contaminating or damaging the pipe.
On many modern common-rail systems, manufacturer repair data may specify replacement of a high-pressure line after it has been removed. Check the correct Vauxhall/Stellantis workshop information for your VIN before reusing one.
10. Remove the Injector Clamp or Retaining Bolt
Remove the injector retaining hardware.
Keep the clamp and bolt organised so you know exactly how everything was positioned.
Do not guess the tightening torque when reinstalling the injector. Injector clamp bolt specifications can include a torque value plus an additional angle, and an incorrect figure can damage the cylinder head or cause sealing problems.
Use current VIN-specific Vauxhall/Stellantis workshop data for the exact tightening specification.
11. Try to Remove the Injector
If the injector is relatively clean and has not suffered combustion leakage, it may loosen with careful controlled movement.
Do not aggressively rock the injector sideways.
The objective is to lift it vertically from its bore without damaging either the injector or cylinder head.
What If the Vivaro Injector Is Stuck?
A stuck Vauxhall Vivaro injector is where the job can become difficult.
Carbon, corrosion and combustion leakage can effectively lock the injector into the cylinder head.
If it will not release with sensible hand pressure, stop pulling randomly.
Use a Proper Injector Puller
A puller applies controlled upward force along the axis of the injector.
Depending on the tool design, the injector electrical or upper section may need to be removed before the puller can attach.
Some professional extraction systems use:
- Slide-hammer pullers
- Mechanical bridge pullers
- Hydraulic injector pullers
The correct tool depends on how firmly the injector is seized and whether the injector needs to be preserved.
Never use unsafe methods such as loosening the injector and running or cranking the engine in an attempt to make cylinder compression fire it out of the head.
Besides damaging components, this can cause uncontrolled movement of the injector and fuel-system hazards.
Remove the Old Injector Seal
Once the injector comes out, check that the sealing washer has come out with it.
Sometimes the old copper injector washer remains stuck at the bottom of the injector bore.
Do not accidentally install a second washer on top of the old one.
Use a suitable seal extraction tool to remove the old washer without damaging the injector seat.
Inspect the Removed Injector
Look closely at:
- Injector nozzle
- Injector body
- Copper sealing washer
- Carbon contamination
- Signs of combustion leakage
- Corrosion
- Damaged electrical connections
- Damaged leak-off fitting
Heavy black deposits running up the injector body usually deserve further investigation before a replacement injector is simply fitted.
Cleaning the Vauxhall Vivaro Injector Seat
The injector seat must be clean and flat enough for the new washer to seal correctly.
Any carbon trapped beneath the new sealing washer can result in combustion leakage returning shortly after the repair.
Use an injector seat cleaning tool designed for the application.
The aim is to remove deposits, not unnecessarily remove cylinder-head material.
Prevent debris from falling into the combustion chamber and clean the injector bore carefully afterwards.
Installing the Replacement Injector
Before fitting the injector:
- Confirm that the replacement injector is correct for the VIN and engine code.
- Make sure the injector bore is clean.
- Make sure the old copper washer has been removed.
- Fit the correct new sealing washer.
- Install the injector squarely into its bore.
- Refit the retaining clamp and hardware.
- Tighten all components using the current manufacturer specification.
- Reconnect the fuel return system.
- Reinstall the high-pressure connection using the specified procedure.
- Reconnect the injector electrical plug.
- Refit any brackets, wiring, hoses and intake components removed earlier.
Do not copy random injector torque figures from a different DV5 engine or another Vivaro model. Always obtain the specifications for the exact vehicle.
Does a Vauxhall Vivaro Injector Need Coding?
Depending on the injector and engine-management system fitted, replacement may require the injector’s calibration/correction information to be entered into the ECU.
Check the information printed on the replacement injector and use compatible diagnostic equipment where coding is required.
Even when an engine starts without injector coding, that does not automatically mean the repair procedure has been completed correctly.
After installation, scan the engine ECU for fault codes and check injector correction values where your diagnostic equipment supports them.
Priming the DV5RUC / DV5RUCd Fuel System
After fuel-system work, the low-pressure side needs to be properly primed before expecting the engine to start normally.
Vauxhall’s 2020 Vivaro manual gives a specific bleeding procedure for DV5RUCd and DV5RUC engines: switch the ignition on, wait approximately one minute, switch the ignition off and then attempt to start the engine. If the engine does not start after a short attempt, the procedure can be repeated.
This is different from the procedure listed for some other Vivaro diesel engines, which is another reason to identify your engine before starting work.
Avoid continuously cranking the starter for long periods.
Checks After Starting the Engine
Once the engine starts, inspect the repair carefully.
Check for:
- Diesel leaking from the injector
- Leakage from the high-pressure connection
- Leakage from the return connection
- Chuffing around the injector seat
- Abnormal engine noise
- Engine-management warning lights
- Rough idle
- Stored diagnostic trouble codes
Never use your hand to search for a leak on a pressurised common-rail diesel pipe. High-pressure diesel can penetrate skin and cause severe injury.
If you suspect a high-pressure leak, switch the engine off and investigate using the correct safe workshop procedure.
Why Do Vivaro Injectors Become Difficult to Remove?
Several factors can make Vivaro 1.5 injector removal difficult.
Combustion Leakage
If the copper sealing washer stops sealing correctly, combustion gases can pass around the injector and create hard carbon deposits.
Corrosion
Moisture around the injector can contribute to corrosion between the injector body and cylinder head.
High Mileage
Repeated heat cycles over tens of thousands of miles can make removal progressively harder.
Previous Incorrect Installation
An injector that was previously installed with the wrong washer, incorrect clamp tightening or a contaminated seat may develop sealing issues later.
Can You Remove a Vauxhall Vivaro Injector Yourself?
A competent home mechanic with suitable tools may be capable of removing an injector that releases normally.
A badly seized injector is a different matter.
Professional help may be cheaper than damaging:
- The cylinder head
- Injector bore
- Fuel rail
- High-pressure pipe
- Injector clamp threads
- Electrical wiring
- Replacement injector
If the injector refuses to move with reasonable force, using a specialist diesel injector removal service is normally safer than escalating to improvised methods.
Vauxhall Vivaro 2019–2026 Injector Removal FAQs
Is the 2020 Vauxhall Vivaro a Mk3?
Yes. The Vivaro C is commonly referred to as the third-generation Vauxhall Vivaro or Vivaro Mk3, beginning with the 2019 model generation.
What engine is in the Vauxhall Vivaro 1.5 diesel?
The Vivaro C 1.5 diesel uses engines from the PSA/Stellantis DV5 family. Relevant references include DV5RUC and DV5RUCd, depending on the exact version.
Are DV5RUC and DV5RUCd the same engine?
They belong to the same DV5 1.5-litre diesel family but should not automatically be treated as identical for every component or calibration.
Always match replacement parts using the VIN, exact engine code and original part number.
Can I reuse the old injector copper washer?
No. Fit the correct new injector sealing washer when reinstalling the injector.
Why is my Vivaro injector covered in black carbon?
A failed injector-to-cylinder-head seal can allow combustion gases and carbon to escape around the injector.
The injector seat and sealing arrangement should be inspected rather than simply cleaning the visible carbon.
Can I pull a seized Vivaro injector out with pliers?
This is not recommended.
A proper injector extraction tool provides controlled force and significantly reduces the risk of damaging the injector or cylinder head.
Does the injector need programming after replacement?
Some replacement injectors require calibration or correction information to be entered into the ECU. Check the exact injector and engine-management requirements with suitable diagnostic equipment.
How do I bleed a DV5RUC after injector replacement?
For the DV5RUC/DV5RUCd, Vauxhall’s 2020 manual says to switch the ignition on, leave it on for approximately one minute, switch it off and then try to start the engine. Repeat if necessary.
Is the 2.0 Vivaro injector removal procedure the same?
No. The 2.0-litre Vivaro uses the DW10 engine family and should not be assumed to use the same removal procedure, components or tightening specifications.
Final Thoughts
Removing an injector from a 2020 Vauxhall Vivaro Mk3 1.5 diesel DV5RUC or DV5RUCd is manageable when the injector comes out cleanly, but a seized injector can turn it into a specialist job very quickly.
The three things that matter most are cleanliness, correct extraction and correct reassembly.
Do not rush the injector out with excessive sideways force. Do not leave contamination inside an open common-rail connection. And do not guess injector clamp or high-pressure fuel pipe tightening figures.
Identify your exact Vauxhall Vivaro engine code, use the correct injector removal tool, replace the sealing components and follow the appropriate manufacturer specifications before restarting the engine.
A careful repair now is far cheaper than repairing a damaged cylinder head later.